LiteSpeed Cache is a website optimization tool that helps to speed up website loading times and improve overall user experience. It works by caching the dynamically generated pages of a website and serving the cached version to visitors, reducing the processing load on the server and the time required to generate the page dynamically. Configuring LiteSpeed Cache involves setting up the cache rules, optimizing the cache settings, and fine-tuning the configuration for maximum performance. This guide provides a comprehensive, step-by-step approach to configuring LiteSpeed Cache for optimal website performance.
Table of Contents
- Install the LiteSpeed Cache plugin on your website.
- 1st Step General:
- 2nd Step Cache
- 3rd Step TTL
- 4th Step Exclude & ESI
- 5th Step Object
- 6th Step Browser
- 7th Step Advanced
- 8th Step CDN
- 9th Step Image Optimization Summary
- Step 10 Image Optimization Settings
- Step 11 Page Optimization
- Step 12 HTML Settings
- Step 13 Media Settings
- Step 14 Media Excludes & Localization
To configure LiteSpeed Cache, follow these steps:
Install the LiteSpeed Cache plugin on your website.
To install LiteSpeed Cache, log into your website’s control panel, go to the plugin section, and click on ‘Add New’ to search and install the LiteSpeed Cache plugin.

And follow these steps:
WARNING!!
IT’S IMPORTANT TO SAVE CHANGES IN EVERY SECTION OF THE LITESPEED CACHE PLUGIN BEFORE CHECKING YOUR WEBSITE, AS ANY CHANGES MADE MAY CAUSE THE WEBSITE TO CRASH. IF THE WEBSITE DOES CRASH, YOU SHOULD TRY TO IDENTIFY WHICH SECTION CAUSED THE ISSUE AND DISABLE EACH OPTION ONE BY ONE UNTIL THE PROBLEM IS RESOLVED. ONCE THE WEBSITE IS FUNCTIONING AGAIN, YOU CAN RE-ENABLE ALL OPTIONS IN THE SECTION EXCEPT FOR THE ONE THAT IS CAUSING THE WEBSITE TO CRASH. THIS WILL HELP YOU ISOLATE THE ISSUE AND PREVENT FURTHER CRASHES. THIS PROCESS SHOULD BE FOLLOWED FOR EVERY SECTION OF THE LITESPEED CACHE PLUGIN TO ENSURE STABILITY AND PREVENT ANY POTENTIAL CRASHES.
Go to the LiteSpeed Cache settings page in your WordPress dashboard.
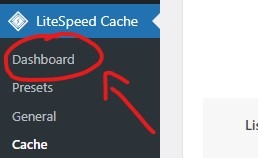
Activate the specified configuration options.
1st Step General:
The General section of the LiteSpeed Cache plugin in WordPress includes options such as “Automatically Upgrade,” “Domain Key,” “Guest Mode,” “Guest Optimization,” and “Notifications.” These options allow you to control various aspects of the plugin’s behavior and determine how it will interact with your website and its visitors.
Turn on all the settings and save changes:
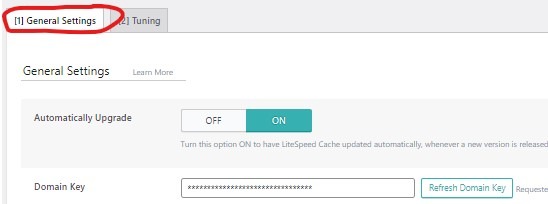
If you are unable to locate the Domain Key in the General section of the LiteSpeed Cache plugin, simply click the “Refresh Domain Key” button and a new one will be generated for you
Leave the section’s setting at its default value.
2nd Step Cache
In Cache tab on Cache Section, Turn on all the settings and save changes:
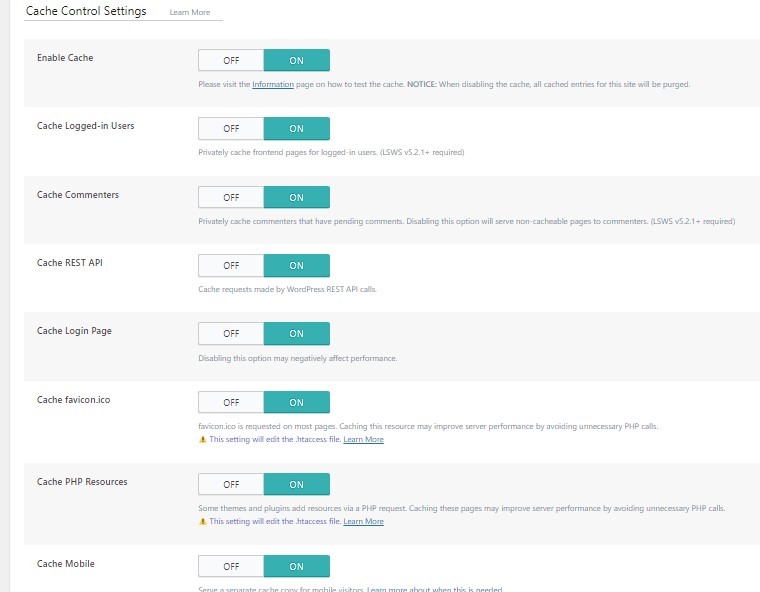
3rd Step TTL
Leave the section’s setting at its default value.
In this step, enable the “Purge All On Upgrade” option and select all the options as indicated below.
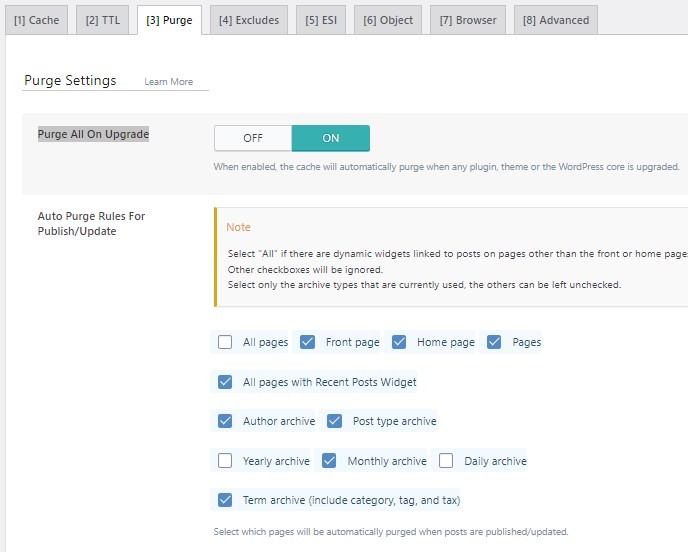
Turn off Serve Stale if it is on and Leave everything at its default value.
4th Step Exclude & ESI
In Cahce’s Exclude Tab Leave everything at its default value.
In Cache’s ESI Tab if you are working on E-Commerce website it is important for you. Turn on all the options shown in the picture and leave the rest of the settings as they are in the ESI Tab of the Cache.
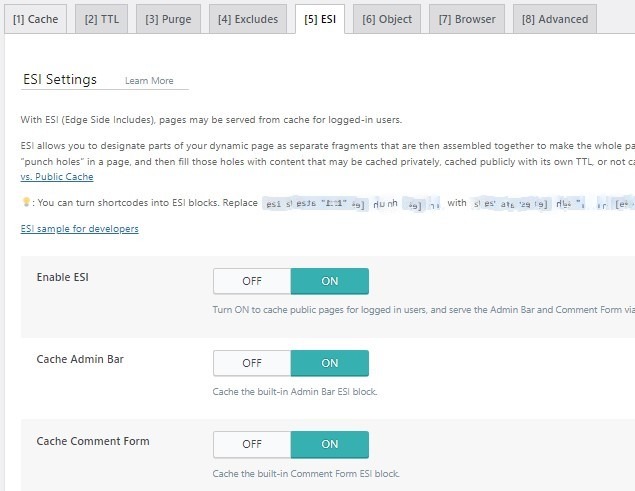
5th Step Object
In the Object Tab of the Cache, turn off Object Cache and set the Method to Memcached. Enable all options shown in the picture 2 and maintain the default settings for the rest.
PICTURE 1
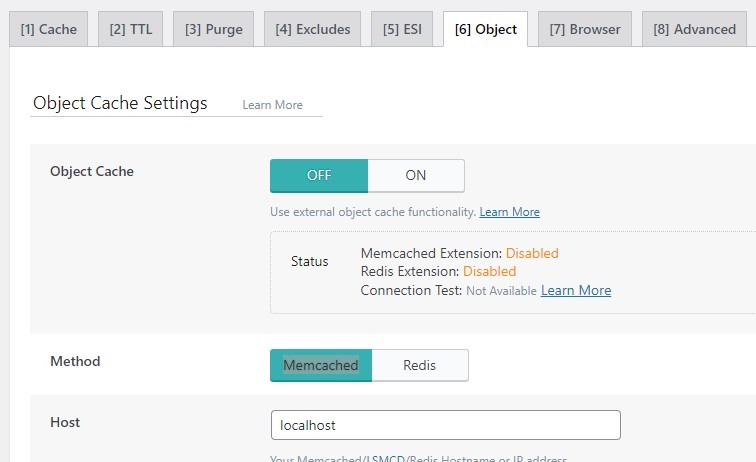
PICTURE 2
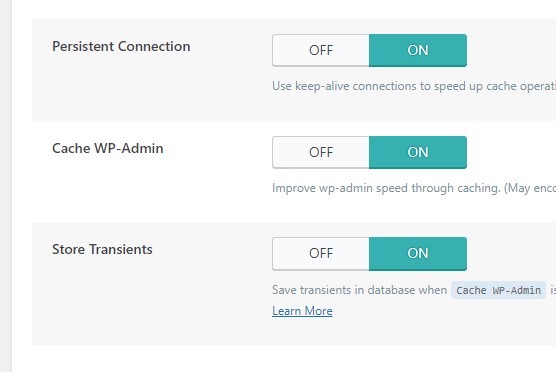
6th Step Browser
Enable Browser Cache

7th Step Advanced
Disable Improve HTTP/HTTPS Compatibility and Enable Instant Click
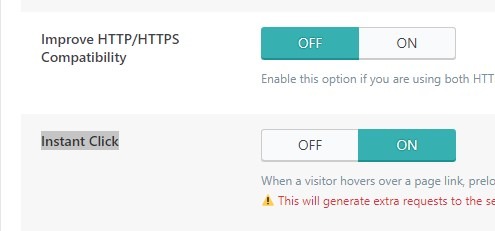
Then Save Changes.
8th Step CDN
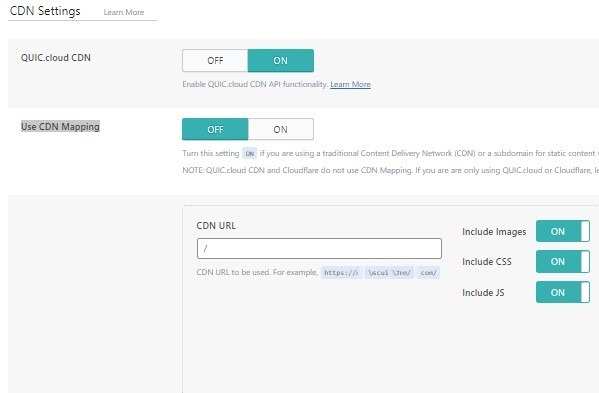
In the CDN Setting section of the CDN, enable QUIC.cloud CDN and disable Use CDN Mapping. If you have Cloudflare, turn on Cloudflare API as well.
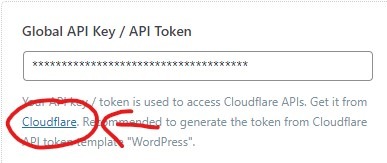
With a Cloudflare account, obtaining your API code is as simple as clicking on the link shown in the image. This code is crucial for integrating the benefits of the Litespeed cache CDN into your website.
And Leave everything at its default value.
More About Cloudflare and LSC configuration.
9th Step Image Optimization Summary
In this tab there is big blue button says Check Images or something like that you will not see that in the image as i already it before but after that the button will start say Send Optimization Request click on the button.
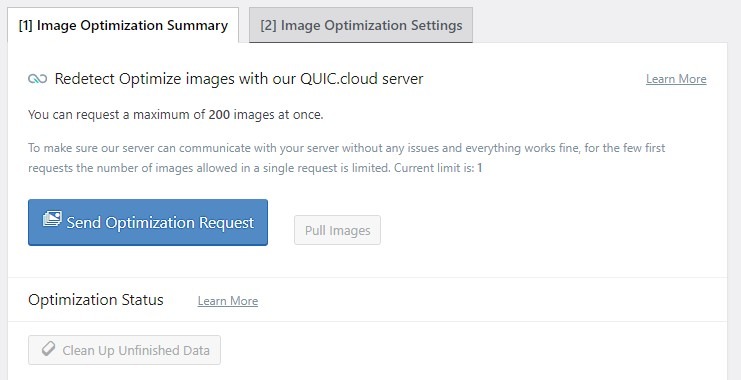
You can request a maximum of 200 images at once. If you have more than this then just have to click it more.
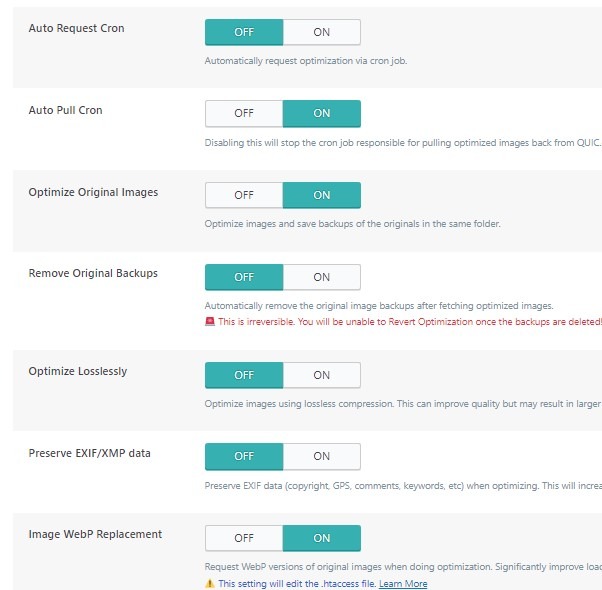
And do not use the orignal backup options shown in the as it is irrevesable act after that you can not restore it.

Step 10 Image Optimization Settings
In this tab, ensure that the ‘Auto Request Cron’ is turned off, while the ‘Auto Pull Cron’ is turned on. Set ‘Optimize Original Images’ to off, ‘Remove Original Backups’ to off, ‘Optimize Losslessly’ to off, ‘Preserve EXIF/XMP data’ to off. Turn ‘Image WebP Replacement’ on and ‘WebP for Extra srcset’ on. Keep all other settings at their default values.
PICTURE 1
PICTURE 2

Step 11 Page Optimization
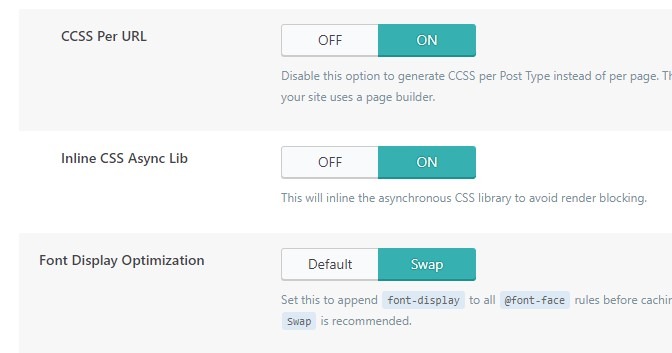
In the ‘CSS Settings’ tab of ‘Page Optimization’s 1,’ ensure that all options are turned on to optimize your page’s performance.
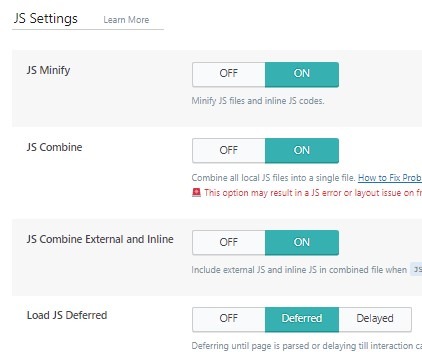
In the ‘JS Settings” tab of ‘Page Optimization’s’, Enable everything and Deffered Load JS.
Step 12 HTML Settings
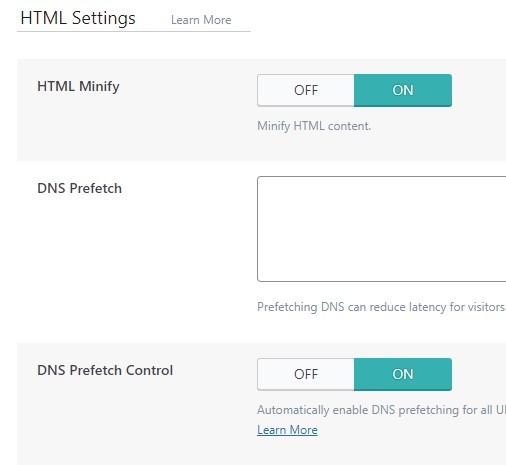
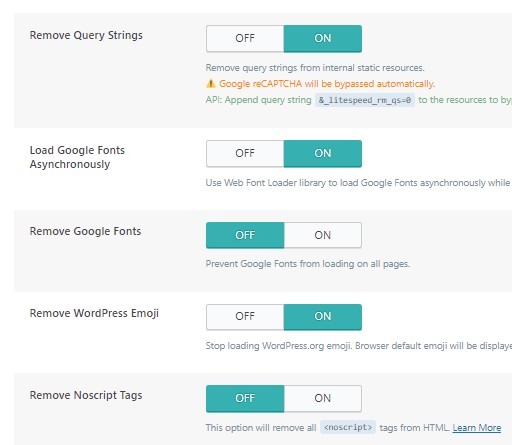
In this step, enable ‘HTML Minify,’ ‘DNS Prefetch Control,’ ‘Remove Query Strings,’ and ‘Load Google Fonts Asynchronously.’ Turn ‘Remove Google Fonts’ off, ‘Remove WordPress Emoji’ on, and ‘Remove Noscript Tags’ off to optimize the page’s performance.
PICTURE 1
PICTURE 2
Step 13 Media Settings
In this step, activate ‘Lazy Load Images,’ ‘Responsive Placeholder,’ and ‘Lazy Load Iframes.’ Turn off ‘LQIP Cloud Generator,’ but enable ‘Generate LQIP in Background.’ Lastly, make sure ‘Add Missing Sizes‘ is enabled.
Step 14 Media Excludes & Localization
In Media Excludes Keep Every Thins Disable, and Localization Keep Gravatar Cache on and leave everything disable.
Upon completion of these actions, your LiteSpeed configuration will be fully set up.
See more about LiteSpeed Cache.


